Hackerbrücke Photo Guide: How to take perfect photos
There’s hardly a place in Munich where you can feel the sense of freedom and big-city life as intensely as here. When the sun slowly sets behind the tracks and the first S-Bahn trains trace their paths of light into the twilight, the Hackerbrücke is the place to be for anyone who can hold a camera. But let’s be honest: taking a really good photo on the swaying steel structure isn’t so easy. In this guide, I’ll show you how to perfectly capture the atmosphere and what you need to pay attention to so that your pictures don’t turn out blurry.
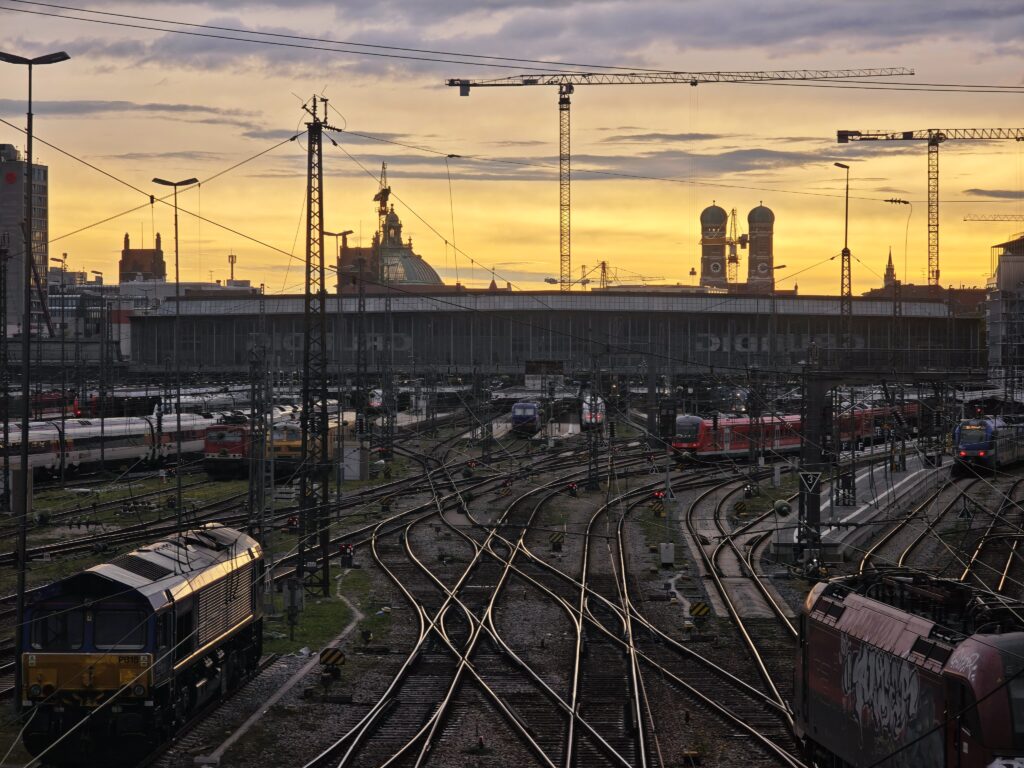
The right timing: When to catch the best light
The Hackerbrücke bridge thrives on this stark contrast: on one side, the cool, hard steel, and on the other, the warm glow of the sky. If you want to take portraits, you should arrive about an hour before sunset – during the golden hour, the steel glows a beautiful reddish hue. For classic night shots with the light trails from the trains, however, you have to wait until the blue hour, shortly after the sun has disappeared. Then the sky turns a deep blue, and the yellow lights of the tracks truly come to life. A little tip: go on a Tuesday evening rather than a Sunday. There’s much more activity on the tracks during the week, and you’ll capture significantly more light trails from the S-Bahn trains in your photos.
The technique: How to get the wobbling under control
The biggest problem on the bridge isn’t actually the light, but the vibration. The entire structure sways when a bus or train passes by. If you simply place your tripod anywhere on the sidewalk, your long exposures will almost always be blurry. It’s best to find a spot directly above one of the massive bridge piers, as this is where the vibrations are least pronounced. Another great option: skip the tripod and place the camera directly on one of the flat steel girders. A rolled-up scarf as a base will help with alignment.
The correct settings for the light trails
To make the trains look like colorful light strips, you need to switch to manual mode. Set the ISO to 100 to avoid noise in the image. Set the aperture somewhere between f/8 and f/13. You’ll need to experiment a bit with the exposure time; 10 to 30 seconds usually works well. It’s best to wait until you see a train approaching and then take the shot. One more important point: autofocus often gets confused in the dark. Focus once while there’s still some light, and then switch the lens to manual focus. This will ensure the focus stays where it should.
Guiding the eye: How to construct your image
The bridge’s architecture actually does half the work for you. The tracks below are perfect lines that guide the eye directly to the horizon. Try shooting through the steel arches – it creates a natural frame for the Frauenkirche in the distance. And don’t forget the people: the Hackerbrücke is famous for everyone hanging out on the girders. A photo taken from behind, showing only the silhouette of someone gazing at the sunset, often captures the atmosphere on the bridge better than any purely technical shot.
Safety and a little decency
To keep the evening relaxed, here are two quick points. Even if the photos from way up on the supports look cool: don’t do it. The Federal Police don’t take kindly to this, and it’s dangerous to boot. The lower supports are perfectly adequate for a good angle. And think of the commuters: people are often rushing to the central bus station or the S-Bahn. Just make sure your tripod isn’t in the way, and everyone will have a good time.
Related Links:
- all about the Hackerbrücke
- Hackerbrücle parking lots close to the bridget
- the transportation hub ZOB München